You’ve followed the recipe perfectly, the kitchen smells like heaven, and you and your little ones are eagerly waiting for the timer to go off. But when you pull the baking sheet from the oven, something’s not quite right. Your cookies have spread into thin, greasy puddles, or they’re tough, burnt on the bottom, or just plain bland. It’s a frustrating moment every home baker has experienced, but don’t hang up your apron just yet! Most cookie mishaps are surprisingly common and easy to fix.
Baking is a science, and small variables can lead to big changes in your final product. But the good news is that once you understand why these problems happen, you can prevent them from ever ruining your family’s favorite treat again. In this ultimate cookie troubleshooting guide, we’ll solve the most common cookie conundrums so you can bake perfect, delicious cookies every single time. Let’s turn those baking fails into wins!
Problem 1: My Cookies Spread Into Flat Puddles
This is perhaps the most frequent cookie complaint. You put perfect scoops of dough on the sheet, and they bake into one giant, thin cookie-pancake. Here’s why it happens and how to fix it.
The Cause: The Fat is Too Warm
The number one culprit for excessive spread is butter that is too soft or melted. The fat in cookie dough needs to be solid at room temperature to hold its shape as it heats up in the oven. If the butter is too warm before it goes in, it will melt instantly, causing the cookies to spread out before they have a chance to set.
The Solution: Chill Your Dough
As baking expert Tessa Arias from Handle the Heat explains, chilling the dough is a crucial step. After scooping your dough onto the baking sheet, let it chill in the refrigerator for at least 30 minutes. This solidifies the fat, which helps the cookies bake up taller and spread less. Other factors can include using a hot baking sheet (always let them cool completely between batches) or over-creaming your butter and sugar.
Problem 2: My Cookies Are Hard, Dry, or Tough
Instead of a soft, chewy center, your cookies are hard enough to be a hockey puck. This usually comes down to two things: too much flour or overbaking.
The Cause: Incorrect Flour Measurement or Overmixing
Packing flour into a measuring cup can add up to 25% more flour than the recipe calls for, leading to dry, dense cookies. Overmixing the dough after adding the flour also develops too much gluten, making the cookies tough instead of tender.
The Solution: Spoon and Level Your Flour
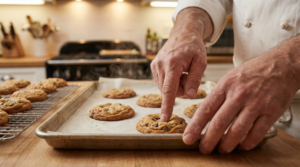
To measure flour correctly, use a spoon to fluff it up in the container, then gently spoon it into your measuring cup until it’s overflowing. Use the back of a knife to level it off. When mixing, only mix until the last streaks of flour have disappeared. For perfectly tender results every time, check out our many Cookie Recipes that have been tested for success. Also, be sure not to overbake! Cookies continue to bake on the hot pan even after you take them out of the oven.
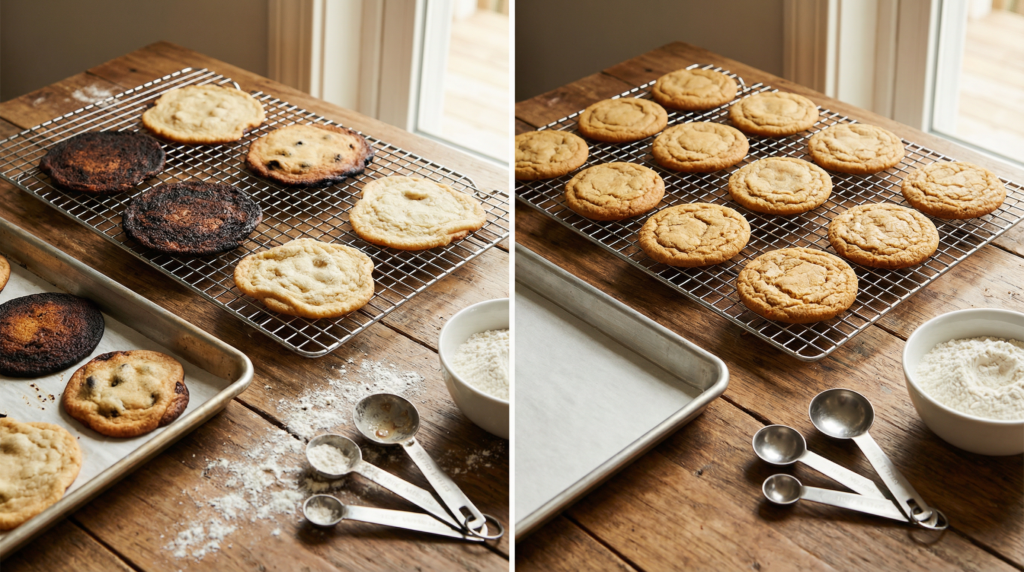
Problem 3: The Bottoms of My Cookies Are Burnt
There’s nothing more disappointing than a perfectly good cookie with a burnt, bitter bottom. This issue is almost always related to your baking pan or oven rack placement.
The Cause: Dark Pans and Hot Spots
Dark-colored baking sheets absorb more heat than light-colored ones, causing the bottoms of your cookies to brown too quickly and burn. Similarly, if your oven rack is too close to the bottom heating element, the direct heat will be too intense. The experts at America’s Test Kitchen consistently find that light-colored, heavy-duty aluminum sheets produce the most evenly baked cookies.
The Solution: Use Light Pans and the Middle Rack

Always use the middle oven rack for the most even heat circulation. If you only have dark pans, you can try lowering the oven temperature by 25°F. The best solution is to invest in a set of quality, light-colored aluminum baking sheets and always line them with parchment paper, which provides a layer of insulation and prevents sticking. An accurate oven thermometer is also one of the best investments for any baker to ensure your oven is actually at the temperature you set it to.
Problem 4: My Cookies Are Pale and Flavorless
Your cookies have the right texture, but they’re pale, boring, and lack that rich, buttery, caramel flavor you crave. Flavor development is a key part of the cookie-making process!
The Cause: Under-chilling or Low-Quality Ingredients
Flavor in cookies comes from quality ingredients (like real butter and pure vanilla extract) and the magic of time. When cookie dough rests in the refrigerator, the flavors have time to meld and deepen, resulting in a much more complex and delicious cookie.
The Solution: Chill for Flavor and Use Good Ingredients
For the best possible flavor, chill your cookie dough for at least 24 hours before baking. This simple step makes a world of difference! Also, never underestimate the power of high-quality ingredients. Using real butter instead of margarine, pure vanilla extract instead of imitation, and a sprinkle of sea salt on top before baking can elevate your cookies from bland to bakery-quality. For more expert advice, explore our other Baking Tips.
Baking should be a joyful experience, especially when you’re creating memories with your family. Don’t let a few cookie problems discourage you. With these troubleshooting tips, you’re now equipped to handle any cookie challenge that comes your way. And if you want to take the guesswork out of it, our Mommy and Me Cookies kits come with perfectly pre-measured ingredients to help you get it right every time. Happy baking!